
Cooking Scallops perfectly relies on using the proper technique, which can be a daunting task for the home chef. However, it doesn't have to be.
We will cover everything from temperature control to which oil to choose and important scallop preparation. Being a beginner or an experienced chef, our tutorial will help you create the perfect scallop dish.

⬇️ Table of Contents
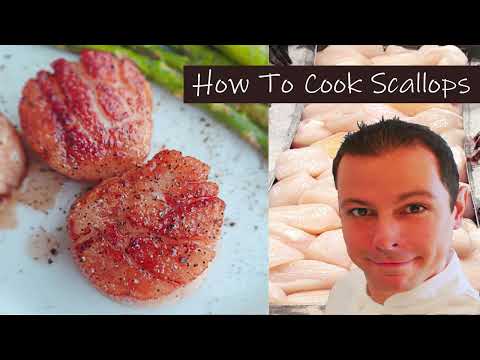
How To Cook Scallops
How many people can say they know how to cook a perfectly seared scallop?
Golden brown scallops can be tricky, for sure. High heat? Low heat? How long should the scallops be cooked, when should they be turned, and what oil should be used?
Our simple chef techniques help ensure that the scallops will never be tough or rubbery again.
Dry Scallops - Before cooking the scallops, make sure the scallops are very dry. Pat them dry using a paper towel. Wrap them with a paper towel until you are ready to start cooking. This is the single most significant mistake cooks make when cooking scallops.
Non-Dry Scallops will only steam in the pan, which results in zero browning of the scallops.
Temperature - It is critical to pay close attention to the heat level. Often, chefs instruct followers to cook scallops with a screaming high-heat pan. This repeated statement is flat wrong.
The scallops cooked in this article were all accomplished using medium heat to high heat. If the pan were screaming hot, the scallops would rapidly caramelize. Scallops have a good amount of natural sugars and can burn quickly.
Cooking scallops with high heat results in two outcomes:
1) Overcooked scallops
2) Burnt edges around the scallops
Cooking Oil: The oil used for pan-seared scallops can mean success or failure.
Oils with low smoke points cause discolorations. The oil oxidizes, which means the oil breaks down. Once the oil smoke point is exceeded, the molecular makeup has changed, which results in a bitter taste.
Types of Oils To Avoid Cooking Scallops
| Low Smoke Point Oils | Fahrenheit | Celsius |
|---|---|---|
| Vegetable Shortening (Unrefined) | 360ºF | 182ºC |
| Extra Virgin Olive Oil | 325-360ºF | 163-182ºC |
| Coconut Oil (Unrefined) | 350ºF | 177ºC |
| Sesame Oil (Unrefined) | 350ºF | 177ºC |
| Butter | 302ºF | 150ºC |
Oils To Use Cooking Scallops
| High Smoke Point Oils | Fahrenheit | Celsius |
|---|---|---|
| Peanut Oil | 450ºF | 232ºC |
| Clarified Butter / Ghee | 450ºF | 232ºC |
| Canola Oil | 400ºF | 204ºC |
| Avocado Oil (Refined) | 350ºF | 177ºC |
| Light Olive Oil (Refined) | 465ºF | 240ºC |
Methods To Cook Scallops
| Cooking Method | Details | Temperature |
|---|---|---|
| Oven Roasted | 375-450 | 190-323ºC |
| Grill | Until firm with opaque clear white exterior | medium-high |
| Sous Vide | Cook 30 minutes | 145ºF - 62.7ºC |
| Stovetop | Until firm with opaque clear white exterior | medium-high |
How To Cook Seared Scallops
To perform a proper sear, add just the amount of oil needed to cover the bottom of the pan/skillet. Adding too much oil will move the scallops into shallow frying. Use either clarified butter or peanut oil.
A mistake to avoid: do not add the scallops to the pan/skillet before the oil heats up. The result is scallops without color; the golden brown we all want is not likely to happen without overcooking the scallops.
- Pat scallops very dry
- Season with salt and white pepper
- Heat up a pan/skillet
- Add high smoke point oil
- Allow the oil to heat up (oil will start moving, almost vibrating once ready)
- Add room temperature scallops, large side down in pan/skillet. (presentation side down)
- Cook the scallops 70% of the way on the same side before turning/flipping
- Once cooked, place on a paper towel to dry.
- Sprinkle with sea salt
How Long Should I Cook My Scallops?
Scallops should be cooked for about 2 minutes per side.
How To Thaw Scallops
The best solution is to place them inside a plastic bag overnight in the refrigerator. When you are close to cooking time, place the scallops on the counter to room temperature for even cooking.
The second method is to thaw the scallops in room temperature water, never hot.
Should Scallops Be Rinsed Before Cooking?
Perform the sniff test. Do they smell sweet and of the ocean? If so, rinse them off under cool water. If the scallops have a strong smell of seafood/fish, they may have gone bad. Fresh scallops are only good unfrozen in the refrigerator for 2 to 3 days.
Can Scallops Be Brined?
Most certainly. Brining offers a chance to increase the natural flavors in the scallops. On the exterior of the scallop, the proteins will begin to change from the salt, creating a protective seal that locks in moisture. A cool step most cooks never consider.
How To Brine Scallops
Use a large bowl and add the following ingredients:
- 2 cups of room temperature water 🌊
- ⅓ cup of salt 🧂
- 3 cups of ice 🧊
Allow the salt to melt, then add the scallops. Please keep them in the brining solution for up to 10 minutes. Then rinse the scallops off under cold running water.
The most important tip is to dry the scallops the best you can using a paper towel. Then, place them on a wire roasting rack and place them in the refrigerator to air chill. The cold air will further dry the scallops.
Watch How To Make:
Faqs
Wet-packed scallops -typically range in price from $15 to $20 per pound.
Dry-packed scallops - typically range in price from $20 to $35 per pound.
No, you do not need to clean your scallops before cooking them. The abductor muscle or the "foot" of the scallop, which is the tough part that is usually removed before cooking, can be eaten.
Recipes To Try
- Baked Teriyaki Salmon with Avocado Crema
- Salt Crusted Branzino
- Texas Chicken Tortilla Soup | Traditional Texas Classic
- Bacon Wrapped Scallops | Chef Techniques
📖 Recipe

How To Cook Scallops
Suggested Equipment
Ingredients
- 12 scallops Large Sea Scallops (colossal scallops) dry-packed scallops brown better than wet packed
- 4 tablespoon Clarified Butter Has higher smoker point, reduces the chance of burning
- 4 tablespoon Olive Oil Mixing butter and olive helps improve the taste and smoke point level
- 1 ½ teaspoon Sea Salt season to taste
Instructions
Prep the scallops
- Inspect the scallop for a small muscle attached to the side called the abductor muscle. Suggested to remove it due to being chewy. It peels off very easily. Almost too easy to the point you could rip the scallop, so be careful
- The recipe is for 4 people, each person getting 3 large scallops plated. Chef Tip: The reason for 3 each is first, cost control, and second professional plating is done using odds number plating. The brain looks for even numbers, so when serving odd numbers the brain interprets the plating as nicer, more visually appealing.
Cooking the scallops
- Cooking the scallops: Pat scallops very dry. Season with salt and white pepper. Heat up a pan/skillet. Add high smoke point oil. Allow the oil to heat up, the oil ready once it starts moving, almost vibrating in the pan.Add room temperature scallops, large side down in pan/skillet,, the presentation side.Cook the scallops 70% of the way on the same side before turning/flipping.Once cooked, place on a paper towel to dry.
- Use a large skillet (Do not crowd the pan with scallops or risk steaming them, which would result in no golden brown scallops. I like using cast iron due to the even distribution of heat. Really helps with the browning.Over medium-high heat. Do not use high heat or risk burning the scallops and oil.Add the Dry Scallops to the pan and cook for 3 minutes. Afterward, add in a few large dabs of butter. Using a large spoon, spoon the melted butter over the tops of the scallops. This will set in a very nice golden brown color.I like to turn off the heat at this point and flip/turn the scallops over and cook on the other side. The scallops will not take as long on side 2 to cook. You can always poke the scallops with your finger to check doneness.
- How to tell the scallops are cooked: Cooked scallops are still soft in texture. The firmness will equal twice that of the raw uncooked scallop. The cook time on scallops is right about 4 to 5 minutes.
Notes
- The scallops need to be very dry to turn golden brown.
- Yes, you can use bay scallops, which are very small scallops that cook in about 60-70 seconds.
- Can I eat the abductor muscle? Yes, the only difference is the texture. They taste just like the rest of the scallop.
- Can you eat scallops raw? Yes, the style of recipe is called Crudo. Thinly sliced scallop plated in a sauce like Ponzu or vinaigrette.
- Can you reheat cooked scallops? Yes, it is safe to do so, but the texture will suffer. If you must reheat, do so by steaming.


Orval Bracco says
I like the helpful information you supply to your articles. I'll bookmark your blog and check again here regularly. I am relatively certain I'll be told plenty of new stuff proper here! Best of luck for the following!